
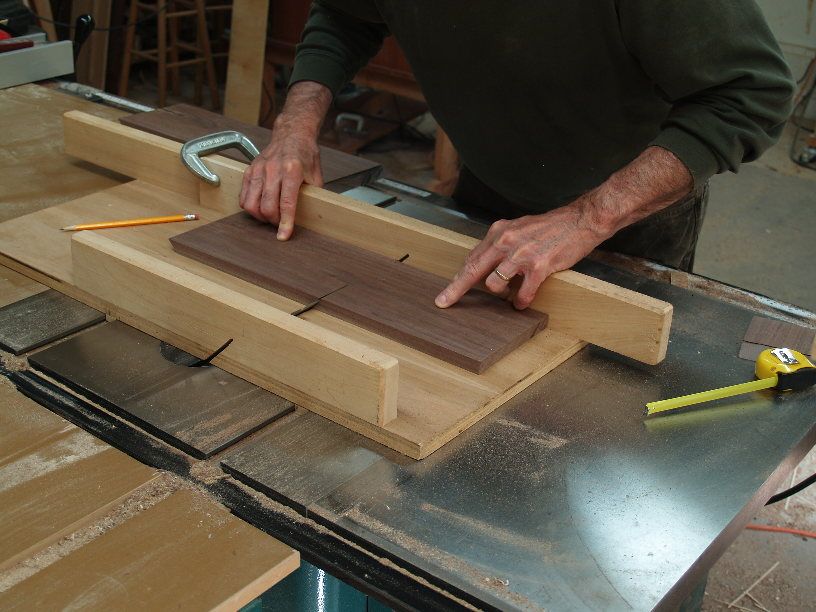
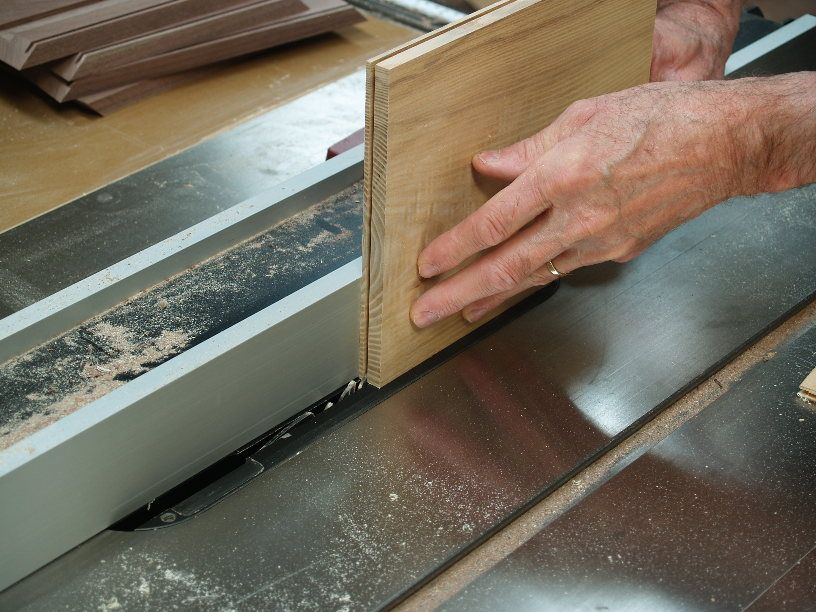
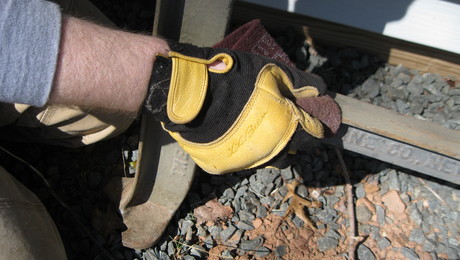
Photo one shows cutting box material into two equal lengths.
Making a Crematory Urn: Part One
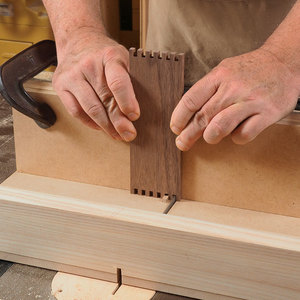
You may think of an urn as being more like a vase, but according to all things Google, a box can be an urn, too! Many of the wooden boxes available for purchase could be described as cheesy at best. So I designed this simple lift lid box to contain the plastic box housing the ashes of the husband of a friend. The sides are 9/16 in. thick walnut and the top and is curly ash. The corners are mitered and keyed with the same ash used for the top. The bottom panel is 1/4 in. Baltic birch plywood, glued in place to give the box additional strength.
My method for making boxes is simple and direct and evolved from many years of box making in my own shop but also from many years of teaching box making to students at various woodworking schools. My students have always been great at challenging my methods and proposing alternative techniques. I know these techniques work to make boxes quickly, and accurately… boxes that express care in the making, and these same techniques can be used to make other boxes as well… Graduation gifts, for example.
Prepare Stock for the Sides
I planed the sides of my box down from 3/4 in. stock to a finished thickness of 9/16 in. While you could cut each side from a different board, I used a 3 corner match which required a length of continuous stock 38 in. long. Straighten one edge on the jointer, and rip the stock to a finished width on the table saw. Your stock preparation must be done with care as the accuracy of the following steps is dependent on the edges of your stock being perfectly parallel.
Miter the corners
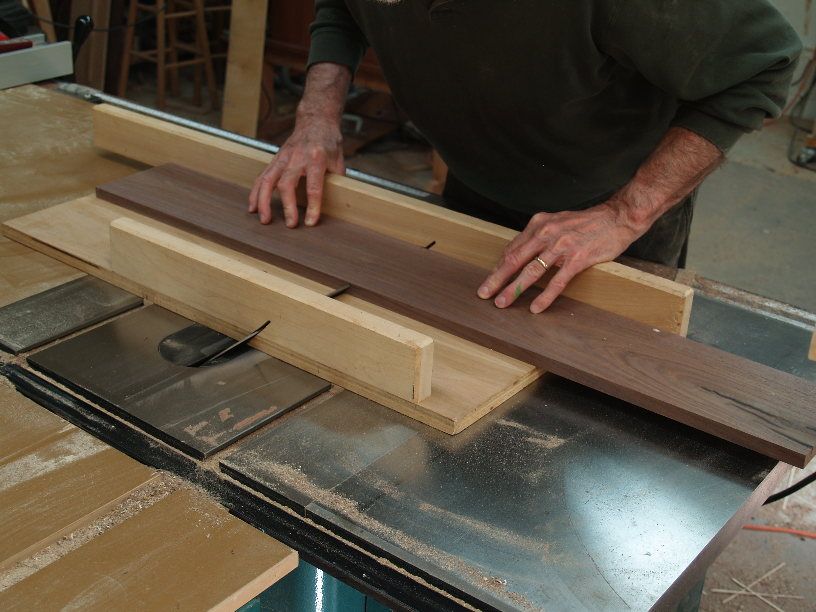
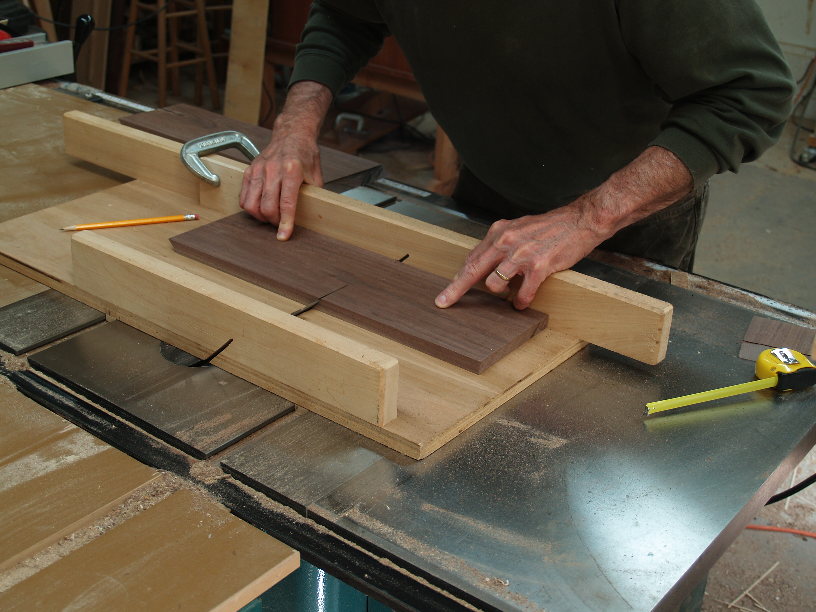 I use a sled on the table saw to cut the sides to length and miter the corners at the same time. This is a dedicated sled used for no other cuts, so at any time I need to quickly make a box, all I need to do is tilt the arbor of the saw to 45 degrees, put the sled in place and cut (assuming of course that my table saw stops are accurately adjusted). In order to cut the parts accurately to length, I use a stop block clamped to the sled, but in order for the stop block to be used effectively, I first cut the walnut stock right in the middle into two equal lengths, each 19 inches long, (photo one) enough for one end and a front or back in each part. First cutting the stock in two parts gives access to the two ends or the front and back to be cut at the same lengths in direct order. (photo 2)
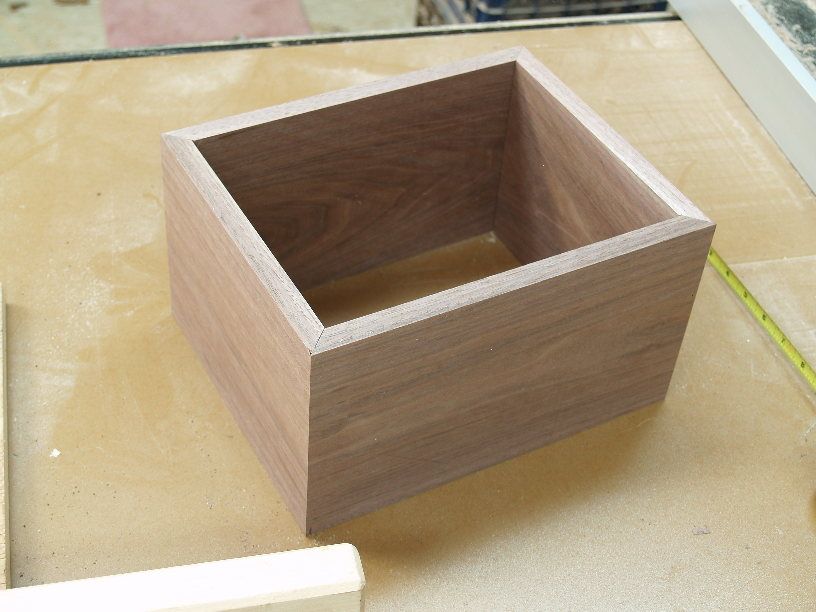
Adjust the stop block to first cut the front and back and then reset its position to cut the ends to length. Those wood workers who may have had trouble with miters in the past should find this technique useful, as there are three common problems with miters: Stock can be out of square, miter angle can be off (even a half a degree can matter), or opposite sides can be of unequal length. (photo 3)
Fit the Top and Bottom panels – Prepare for Assembly
Even though we now have perfect miters, there are still some things that must be done to allow for the assembly of the box… rout dados in the box sides for the lid keeper strips to fit, and cut grooves for the top and bottom to fit.
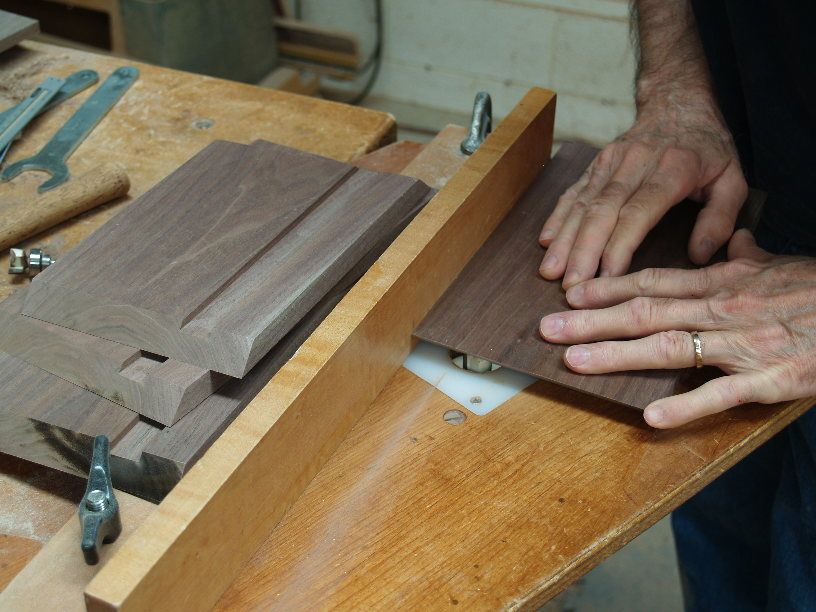
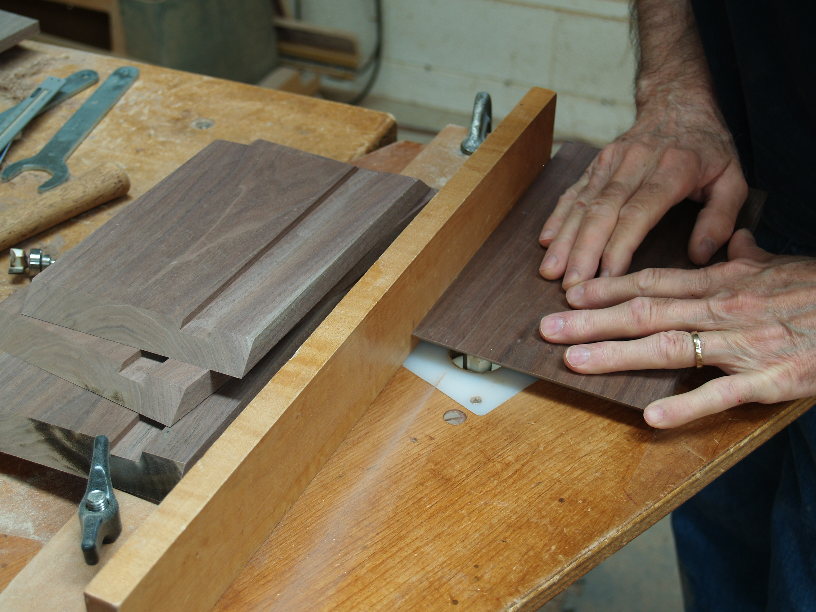 I use the router table with a ¾ in. straight cut router bit to rout the dados in the sides. (photo 4) The exact placement of this dado depends on where you want to separate the lid from the base and must also take into consideration the placement of the miter keys that will be used to strengthen the miter joints. I set the height of the router bit at ¼ in. and will use ¼ in. thick strips to bridge between the box and lid when the box is closed.
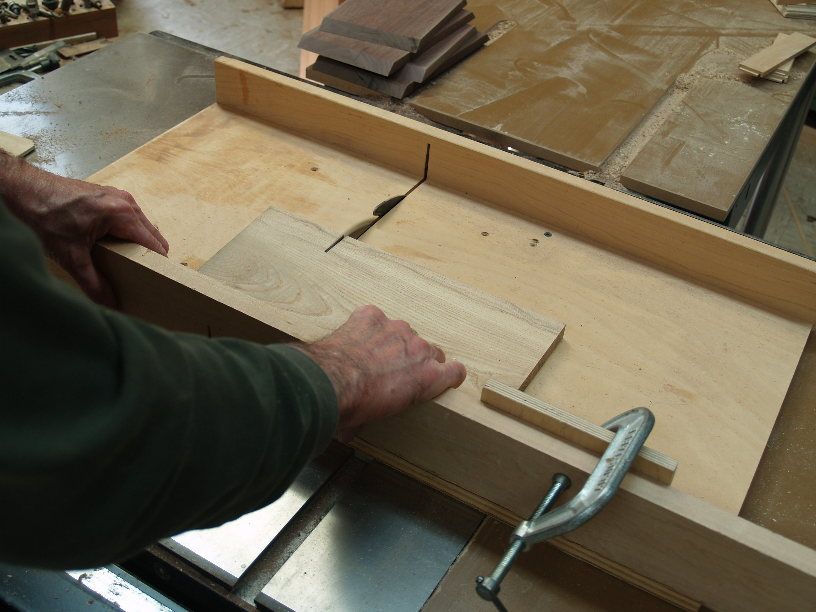
To determine the size of the size of the top and bottom panels, tape the box sides together, measure the inside space in both directions, and add ½ in. to each. I then subtract an additional 1/32 in. in width of the top panel to allow for expansion during inclement weather conditions. This dimension will allow for a tongue and groove method of installing the floating top panel. Cut the top and bottom panels to size using the table saw and sled (photo 5) and then set up the table saw to cut to a depth of ¼ in. with the fence set so that there is a 1/8 in. space between it and the blade. I make practice cuts on two pieces of wood to see that they interlock tightly but without force before making these cuts. Make ¼ in. deep cuts along the inside faces of each box side at both top and bottom, with the stock inside face down on the table saw. Then make the exact same cuts along the edges of the top panel (and ¼ in. Baltic birch bottom panel) with the stock standing up along the fence. (photo 6) A zero clearance insert in the table saw is required for making this cut safe.
Assemble the Box
Before assembly, be sure to mark somewhere on the outside of the box the location of the dado on the inside of the box where the lid keeper strips will fit. Knowing this location will be essential when the lid is cut from the base and as you plan the location of miter keys. Sand all parts of the inside of the box now, before assembly, as it would be nearly impossible to do a good job when all the parts are glued in place.
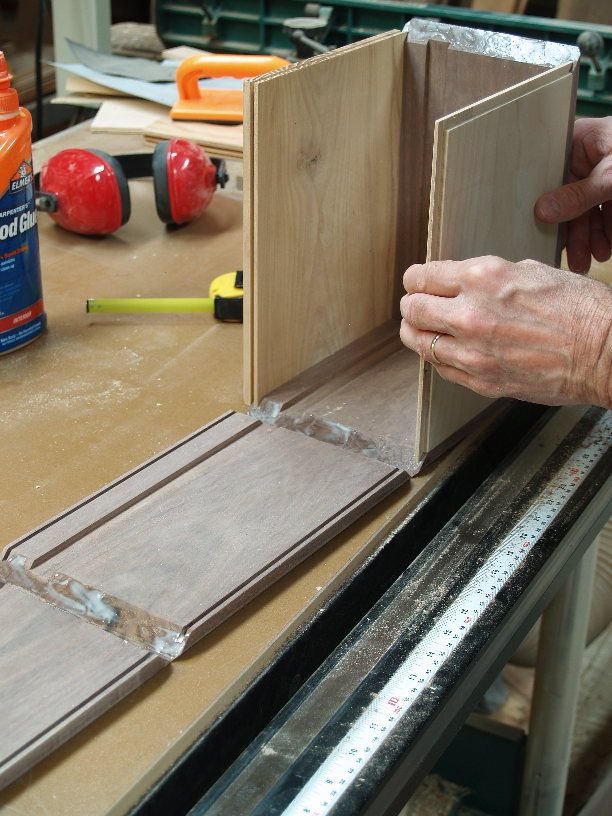
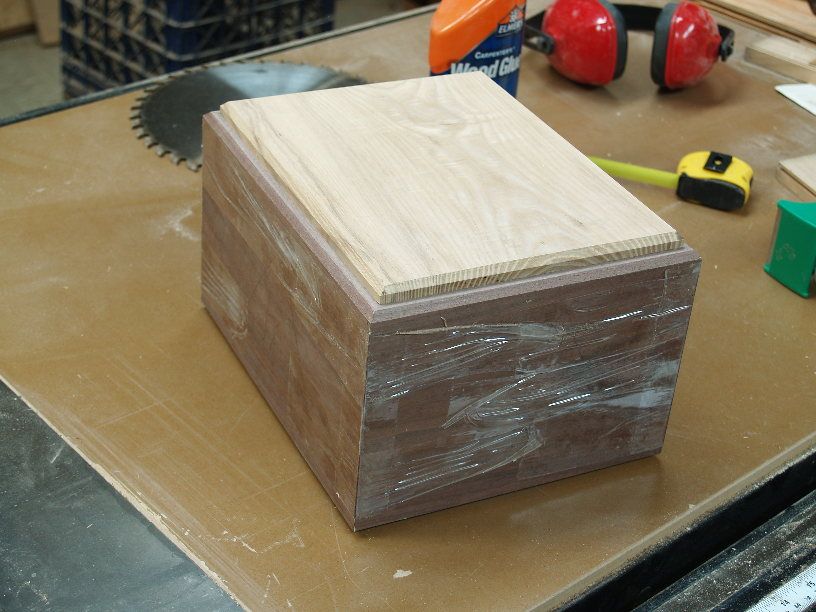
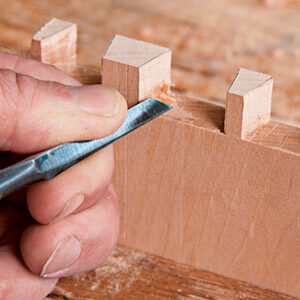
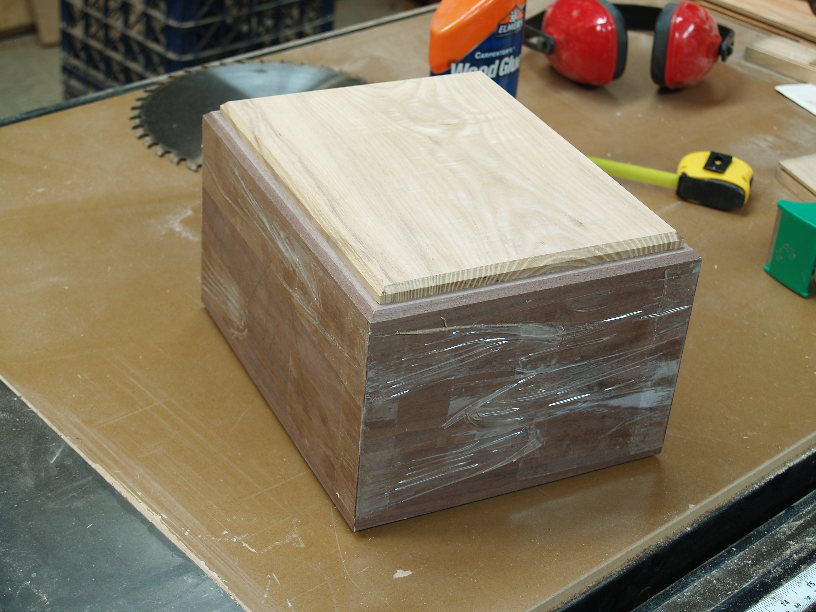 I use common package sealing tape to help in the assembly of boxes. First carefully arrange the box sides to align the wood grain at the corners, Then spread glue on the miters. I also put a bit of glue into the ends of the grooves where the Baltic birch ply bottom will fit, allowing this part to become of structural use. Avoid putting glue into the groove where the floating top panel will fit except at the center of the ends where the glue will be useful in keeping the lid from changing position in dry humidity. Begin rolling the box sides around the top and bottom panels. (photo 7) Tape is cheap, and does a better job than clamps for pulling corners tight. I apply a great deal of pressure as I pull the tape tight at each corner. When you see that all the corners are pulled tight (look closely!) then let the box sit and wait for the glue to dry.
In my next blog entry, I will install miter keys, cut the lid from the base and come up with a beautiful finished box. A box like this can be made on a weekend or a day if you’ve practiced and have the right tooling in place. These techniques, making boxes simply, but creatively, are among the many lessons I share in my box making classes at woodworking schools during the summer months. This summer I will be at the Marc Adams School of Woodworking in Franklin, Indiana and at the Center for Furniture Craftsmanship in Rockport, Maine. In either class, students will learn a wide variety of box making techniques, make boxes in a variety of designs, exploring their own design interests.
You can read more in about making this box in Part 2
Get more on urns and boxes from FineWoodworking.com:





Comments
Looks like it's going to be a beautiful expression of love for your friend. Being in the funeral business I'm only asking why you are having a removable lid? Almost all the products I work with are filled thru the base. Please don't take my question as anything other then admiration for your art. Sorry for your loss, Michael
I have done them that way as well, but in this case decided that a bit of empty space at the top could be used for letters or photos of the deceased, and also that the box might later be useful for other things if someone in the family chose to do something else with the ashes, whether distribution from a mountaintop, interment in the garden, or burial at sea.
Thanks for asking.
I've learned many valuable lessons about boxes reading your books and articles. Having made several cremation urns for family and friends, all of which will hold the ashes of both husband and wife. I'm curious about dimensions both inside and out, as I've had to guesstimate from information on the web. By the way, my boxes all have lids with wooden hinges and front clasps. I used your technique of assembling the box and seperating the lid afterwards. Works great.
You couldn't be more timely with this posting. I spent last Saturday working on a crematory box (I have 2 of your books on boxes). My first one, and I botched it - so I'll probably start over using some of the ideas you're posting here. I'm especially interested in making sure there is a place for pictures in the box - possibly to be displayed open during the service. Thanks so much for what you do - big fan. Joe
Doug, I have been intending to write to thank you for your techniques for building the perfect box. I have made quite a few over the past several years, mostly keepsake boxes but also several jewelry boxes with small drawers or hidden compartments. I have shaped the profiles using bandsawing, routing, and hand work...mostly hand work. I have also made a couple of rectangular urns for family members similar to the one you describe here. I am currently building an urn for my mother-in-law with six curved sides and access through the bottom. Again, thank you so much for your inspirations, Bob
This may seem to be on the morbid side of cremation urns but I've done several of them and wondered about sizing them. According to an undertaker friend of mine it takes about 1 cubic inch of volume inside the box for every pound of weight. I have one client who has an urn ready not only for herself, but for her mother who's still alive. Currently they're decorative items sitting in the daughter's home. Pre-planning is good right?
Here in Arkansas, many old-timers would make their own caskets and keep them in the barn until needed. I suppose it was a way of coming to terms with their own mortality. There is a book out about making your own casket. Who would have thought it would be such a hit?
In any case, making a crematory urn (or any other box) is a good excuse to spend time in the wood shop, working with tools, hands, and beautiful woods. Can anything get better than that?
i,v read all of the comments posted,i would like to say to all that have built an urn, or even a box, give yourself a pat on the back. here lately my wifes best frind past, i was asked if i would build an urn for the family,they could not afford to buy a comercial made urn,(very expencive). i felt a little bit proud they asked me to build it. doug i,v read all your writeings and some, i,v made many mistakes but i look at it as a learnig experiance.the project,what ever it my be is there in the wood,i "we"just have to bring it out. thank you to all for helping me improve my wood working, now lets go bend some nails
I have created a number of similar boxes over the year for family pets who have been cremated. Rather than a hinged top, I have used a removable bottom, set into a rabbet around the bottom edges, held in with small brass flat head screws. Both Woodcraft and Klockkit can provide small brass engraved name plates to nail or screw on.
How nice to know this is a common practice. Last year when my father in law died, I built a box for him and a matching one for my still living mother in law. I had a large plate engraved for the top for a very reasonable fee, inlaid a banding of crosses and reinforced the mitered edges with chevrons. As he was from Peru, I used Peruvian mahogany. The box is permanently sealed and is flanked with solid brass handles. A very nice way to give honor to the departed. My wife's family was so greatful for the gesture. Such a gift carries so much meaning for the family.
What a great and fitting parting gift for a loved one. My mother wishes to be cremated and i think i shall make one for her.
I made the small router table you show in this article and in your book. Using a small PC router. The simplicity and accuracy of the pivoting fence is pretty cool and being able to clamp it into my end vise makes it quick and easy to run small pieces. It's much quicker to set up then the larger router table I built into my tablesaw that uses the rip fence. Thanks!
Retired08, the simple router table was a thing I came up with in the days when router tables were first coming into vogue. I've never seen the need for a larger one, and I can make a new special purpose fence for mine in minutes. I even have a fence that allows me to make turned shaker knobs on the router table. I'm glad you've found yours so useful. The completely surprising thing is that you can make one in under an hour that can last years.
My mom passed in October of last year. My sisters asked me to make the urn. Being a novice woodworker I was a little apprehensive. But thanks to the prior box making video on this site and articles written by Doug in FWW's back issues, I was able to make something that everyone was impressed with. I used curly maple for the sides and figured walnut for the keys and an inset in the top. Thanks Doug (and FWW), you've been a big help.
My brother-inlaw and I made the box urn for my father in 2010. One of the things we found, was that if it is eventually intered in the ground take into consideration the vault sizes available. We had to go up in size on the vault due to lenth of the box.
Thanks for your information. In UK, http://www.cremationurnsashes.com/ is selling handmade and beautiful cremation urns.
Log in or create an account to post a comment.
Sign up Log in