Routing a Rule Joint
Precise hinge placement for a smoothly swinging drop leaf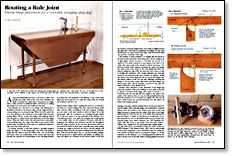
Synopsis: Drop leaves are adaptable to either modern or traditional tables, but the key to making the design tool work well, says Mac Campbell, is the traditional rule joint. One side of the hinge is longer than the other to span the radius of the cove on the table leaf, and screw holes are countersunk on the reverse side from the knuckle, the opposite of a normal hinge. Campbell explains the theory of the joint and then delves into the realities of making it work. Illustrations clarify the discussion. He explains how to cut a rule joint and how to lay out and fit the hinges. Side information reveals how to support the leaf.
A drop leaf dramatically increases or decreases a table’s size quickly and easily, while at the same time eliminates the hassle of storing loose table leaves. Drop leaves are adaptable to either modern or traditional tables, but the key to making this design tool work well is the traditional rule joint.
The principle of a rule joint is very simple: The tabletop has a shouldered roundover cut along its edge, and the hinged leaf has a corresponding cove cut along its edge. When the leaf is raised, the cove rests directly on the roundover so the weight of the leaf, plus serving dishes, elbows or any other objects that might get placed near the joint, is carried by the joint itself and not just the hinge screws. When the leaf is down, the rule joint forms a decorative ovolo molding along the edge of the table. A cross section of this molded edge resembles the brass joint on a traditional carpenter’s rule, hence the name rule joint.
To operate properly, a rule joint requires a specially designed hinge (see figure 1 on the facing page). One side of the hinge is longer than the other to span the radius of the cove on the table leaf. Screw holes are countersunk on the reverse side from the knuckle, the opposite of a normal hinge. In use, the hinge knuckle is mortised into the underside of the tabletop so the center of the hinge pin can be placed at (or near) the center of the arc of both the roundover and the cove.
Theory versus reality—Before getting into how to cut and fit a rule joint, it is worth looking at the areas where the theory of the joint, and the reality of making it work, part company. Certainly, you can make a rule joint exactly as shown in figure 2A on the facing page, with the roundover’s arc traveling through exactly 90°, so the arc’s center is on the underside of the tabletop. On a -in.-thick top with a -in. quirk, for example, this would require a -in. radius cutter for the roundover. However, with this arrangement, the tabletop and extension leaf will rub throughout their full range of motion. At the very least, this abrasion will wear and scratch the finish on these parts, especially if any small crumbs or debris get caught in between the pieces, and the damage will seriously detract from the decorative molding formed by this joint. Also, if the leaf should distort due to seasonal humidity changes, the fit can become so tight it will be unworkable. In addition, because the hinges are mounted on the bottom surface of the leaf, the leaf does not hang straight down, but swings in slightly toward the table base. If the joint is constructed as in figure 2A, this extra tilt will open up a gap between the edge of the leaf and the table and spoil the continuity of the edge.
From Fine Woodworking #80
For the full article, download the PDF below:
Fine Woodworking Recommended Products
Leigh Super 18 Jig
Pfiel Chip Carving Knife

Suizan Japanese Pull Saw





Comments
With the quirk as shown the leaf doesn't overlap the top in the down position. With 13/16 boards and 1/2 inch bits I needed at least a 1/4in quirk.
Log in or create an account to post a comment.
Sign up Log in