The High Art of the Lowboy
Elevate your skills with a regal case piece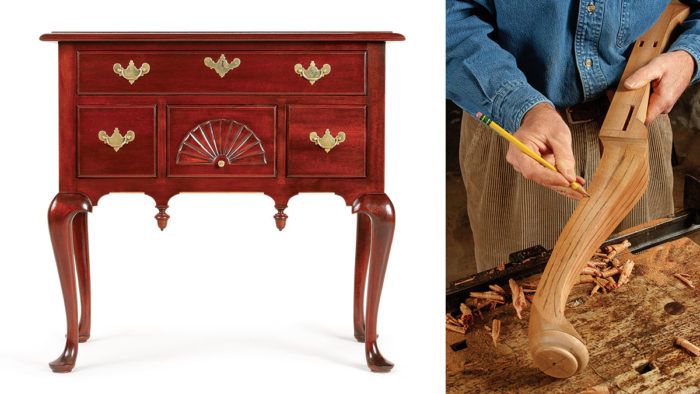
Synopsis: This lowboy is about as traditional as American furniture gets, but it is still highly practical today. The lowboy can be used as a dressing table or hall table, and its design has lost none of its elegance in the last 300 years. Phil Lowe designed this piece to be the perfect project for an intermediate woodworker looking to grow as a craftsman. It combines a mortise-and-tenoned case with cabriole legs, dovetailed drawers, and a tabletop with a hand-shaped edge profile. A fan carving decorates the front of the center drawer.
The Queen Anne lowboy is about as traditional as American furniture gets, but from a modern perspective this 18th-century piece is still highly practical. The lowboy can be used as a dressing table or hall table, and the design has lost none of its elegance in the last 300 years.
For an intermediate woodworker looking to grow as a craftsman, the lowboy is an ideal project. It’s not overly big or complex, but it is a satisfying, high-level test of many skills; so many, in fact, that you’re almost guaranteed to learn one or two new ones before you’re done. The piece combines a mortise-and-tenoned case with cabriole legs, dovetailed drawers, and a tabletop with a hand-shaped edge profile. A fan carving decorates the center drawer (see master class, pp. 92-94).
I’ve modified some of the period construction details to build a case that will accommodate seasonal wood movement. It’s not an exact reproduction, but it captures the spirit of the early pieces.
The cabriole leg: grace under pressure
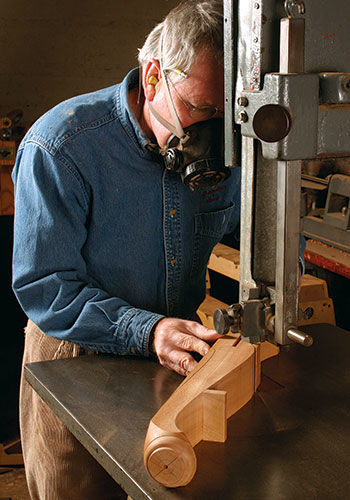
These cabriole legs are slender, but balanced and strong enough to support a heavy case piece without stretchers. They also do more than just hold the case off the floor; their long top posts are an integral part of the case itself. The case can’t go together until the legs are done, so let’s begin with the four legs.
It’s most practical to turn the foot and cut the mortises before sawing and shaping the curved cabriole profile. The first step is to orient the leg blanks for the best figure (see Dan Faia’s “Porringer-Top Tea Table,” FWW #191). Mark the inside corners of each leg, then trace the cabriole pattern on these two adjacent surfaces. On each leg, use a cutting gauge to score a line defining the post block. Set the gauge to the dimension of the waste to be cut away. Score these lines on the tops of the legs, too; this helps keep the position of the leg clear.
To lay out the turned foot, scribe a line around the bottom of the blank to mark the top of the foot. Draw center marks on the two ends of the blank to locate the points of the lathe centers for the offset turning.
Turning and mortising
At the lathe, use a parting tool to turn a cylinder for the foot from the layout line to the end of the blank. Then turn a narrower cylinder at the very end of the blank to establish the pad at the bottom of the foot. Next, use the point of a turning skew to score a line where the square corners of the blank meet the cylinder, defining the top of the foot. Use the skew to soften the hard corners of the square and then shape the foot by rounding off the cylinder to a quarter-round. Sand the foot while it is on the lathe.
From Fine Woodworking #201
For the full article, download the PDF below:

Get the Plan
CAD-drawn plans and a cutlist for this project are available in the Fine Woodworking store.




Log in or create an account to post a comment.
Sign up Log in