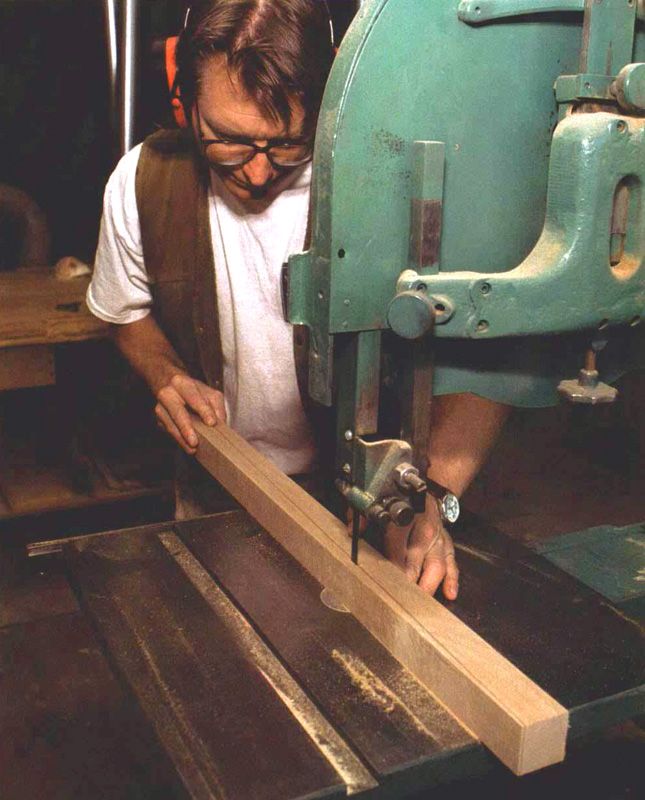
There's more than one way to cut a taper. Here, contributing editor Gary Rogowski makes quick work of a table leg on the bandsaw.
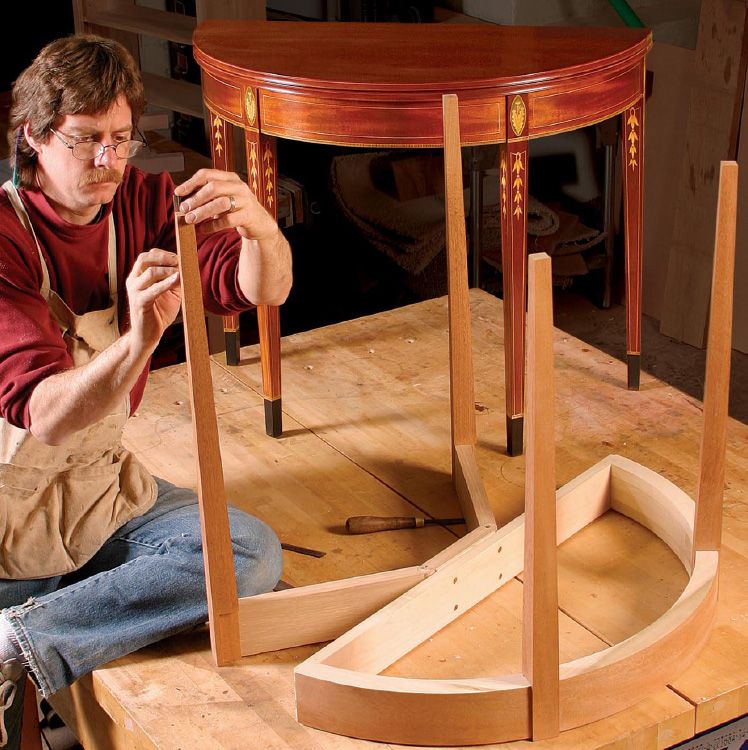
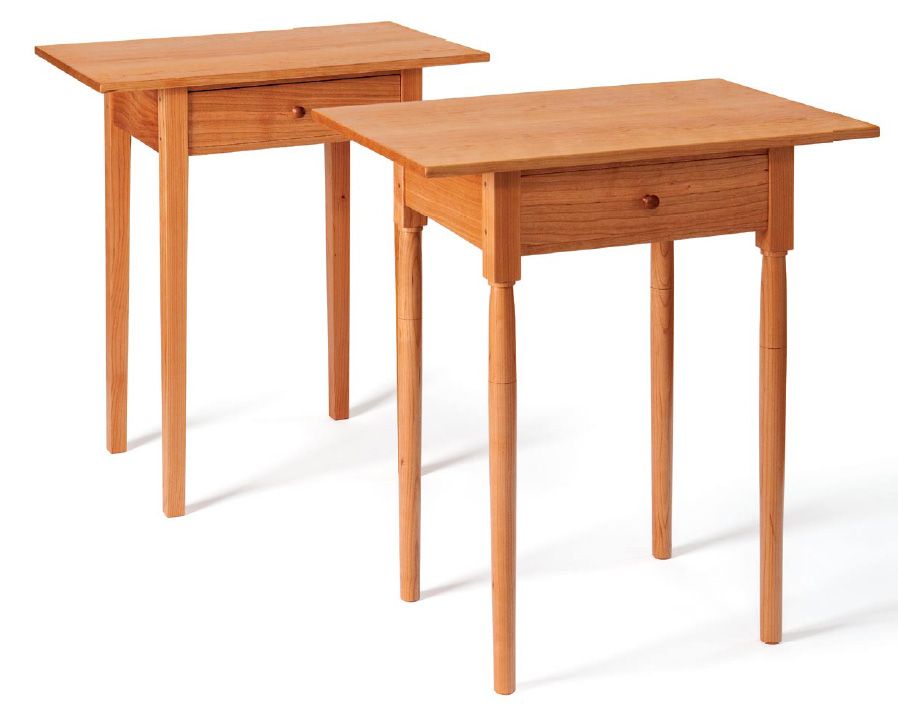
Table or desk legs that have been tapered top to bottom have a grace and delicacy that square legs just don’t seem to have. Shaker furniture makers exploited this leg style, and so have many others. Although legs may be tapered all the way around, more often than not, tapers are cut on two adjoining faces of a leg. The process can be both quick and reliable.
Roughing out tapered legs is best done by machine, either a bandsaw or a tablesaw is a good choice. Tapers also can be cut by mounting leg blanks on a jig that’s passed through a thickness planer, a process that requires very little cleanup. Cleaning up the cuts also can be accomplished in a number of ways—on a jointer, with a router and flush-trimming bit, or with a handplane.
How much taper a leg gets and which faces are tapered are personal choices best made with plenty of experimentation. Lets cover a few of the most common methods to help you on your way.
|
Projects featuring tapered legs: |
Tapered Legs on the Bandsaw
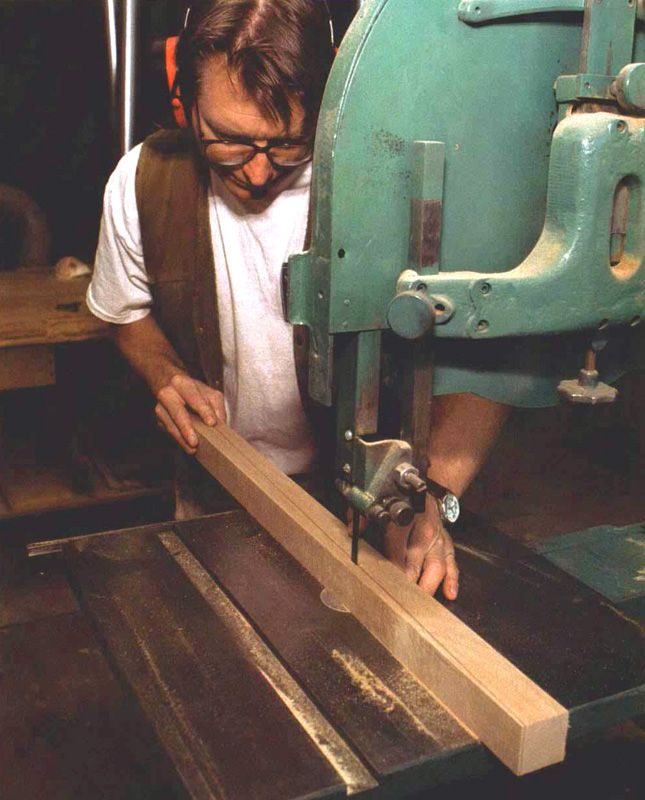
By far the simplest and safest way to cut a taper is to draw lines on two adjacent faces of each leg and cut just to the waste side of the lines on a bandsaw, making straight cuts.
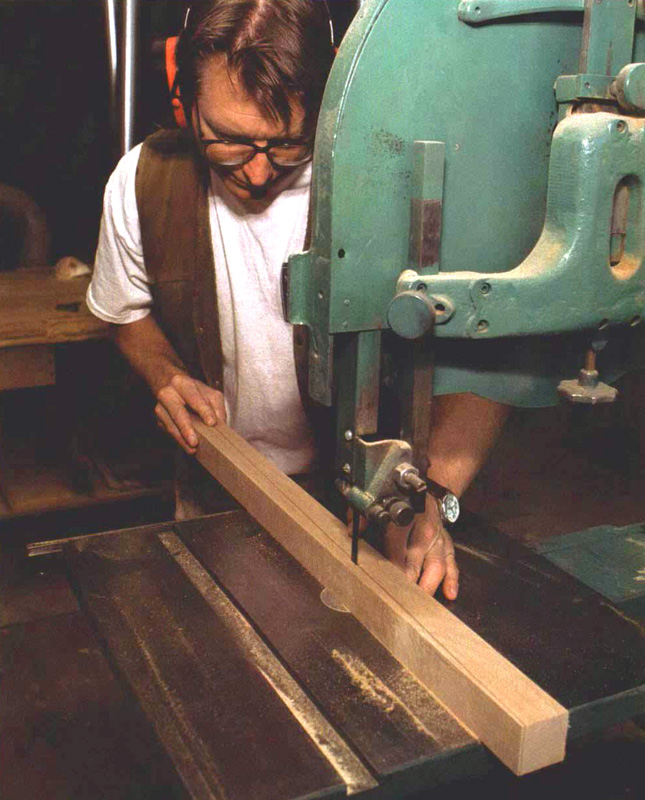 The cut is not that difficult to make if your bandsaw is properly tuned and the blade is sharp. Mark out the taper on a milled leg blank, striking a line from the widest point, where the taper starts, to its narrowest point at the foot. If there’s a flat near the top of the leg where an apron will intersect it, strike a line across the face of the leg where the taper begins or just slightly below it. The idea is to leave enough material on the leg so it can be cleaned up without making the leg too thin.
If the leg shape is one you might reproduce often, consider making a template of 1/4-in.-thick hardboard or MDF. The next time you need to lay out this taper, it will take just a few seconds.
It’s easier to sight down the layout line if you lower your head a bit as you make the cut. Use two hands to help guide the leg through the blade, feed slowly and try to compensate for any drift before you wander from the line. With practice, it becomes quite easy to cut a straight line on the bandsaw. But be careful to keep your fingers out of the way. It’s easy to run your thumb into a bandsaw blade.
Tapered Legs with a Thickness Planer
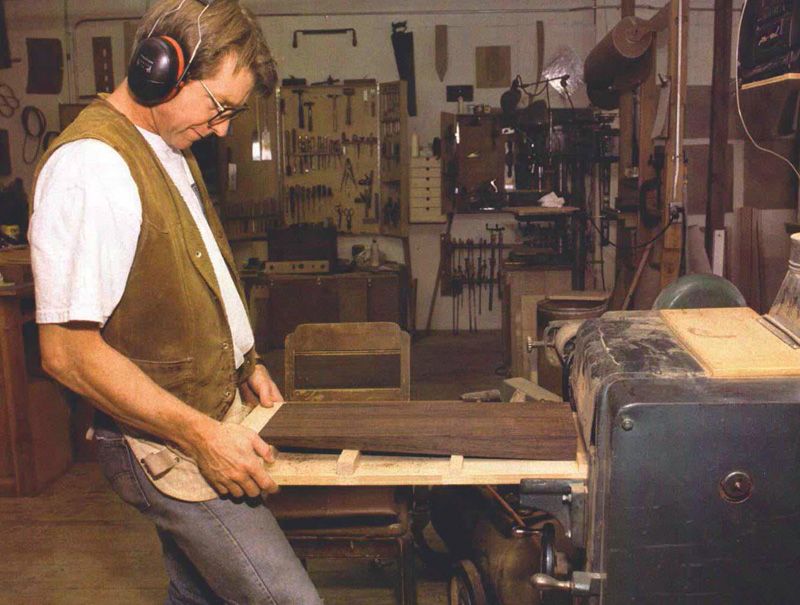
A thickness planer isn’t the first tool that comes to mind for cutting tapers. But a planer will do an absolutely consistent job of tapering leg stock if you use the proper jig—one with a simple carriage that supports the legs at an angle and has stops at either end. The only real drawback is that it’s fairly slow.
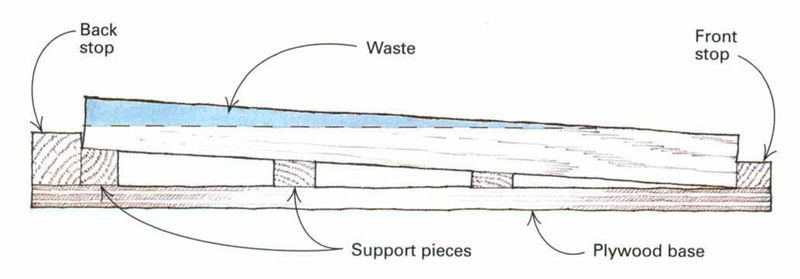
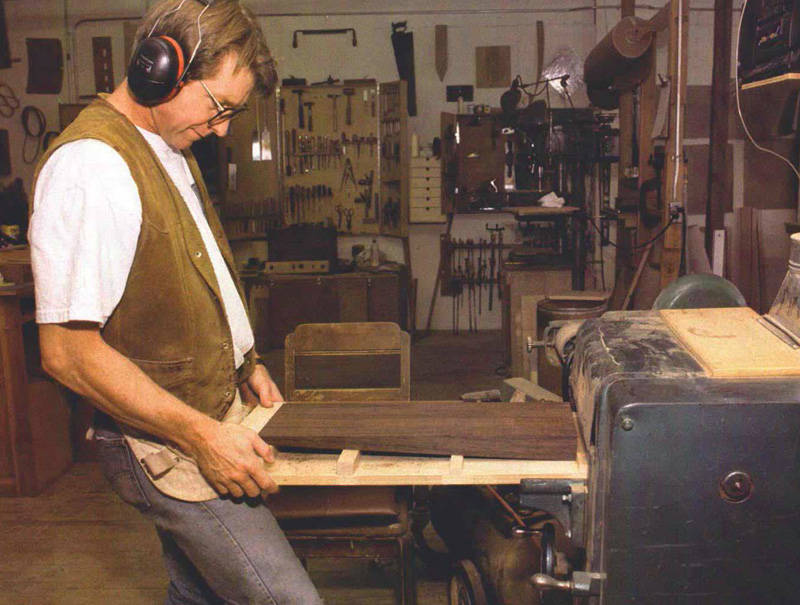 The jig can be built from a piece of scrap plywood several inches longer than the length of the legs. To get the taper you want, draw the taper on one of the legs, place the leg on the plywood base of the jig and raise one end until the taper line is parallel with the plywood. Now measure this height near one end of the plywood, cut a support piece to fit there and glue it into place. Add a stop just behind it. The narrow end of the legs butt against this stop.
The next step is to cut angled pieces that will support the legs and prevent them from flexing under the pressure of the feed rollers in the planer. With these supports glued to the plywood base, add another stop at the front end of the jig to capture the legs securely—you don’t want the stock moving around beneath the cutterhead.
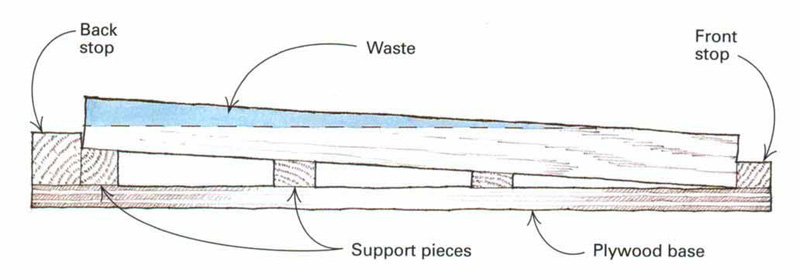
The best thing about this method of tapering legs is that all the legs for a project can be done at the same time. Take light passes, especially at first, to minimize deflection of the stock. Also, make sure the legs don’t rock on the support pieces. If they do, you’ll see some vicious sniping.
| More on thickness planers: |
Tapered Legs on the Tablesaw
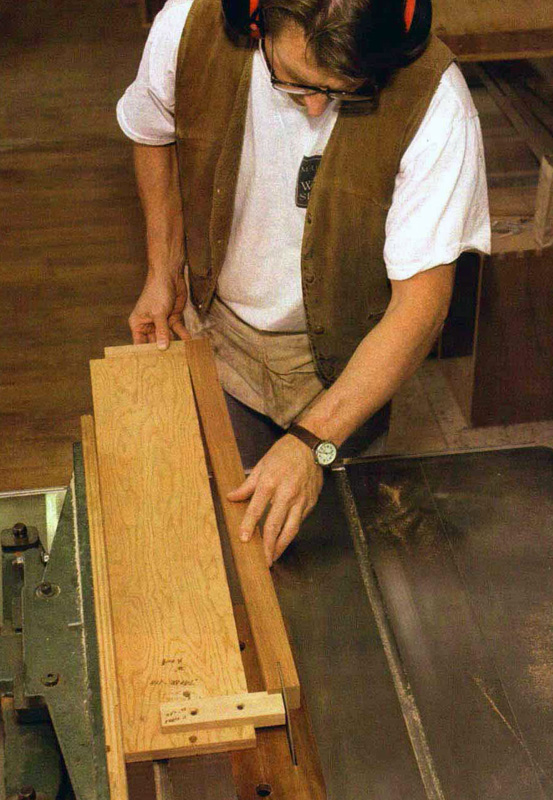 The most commonly used tool for cutting tapers is the tablesaw—and why not? It’s fast and, if the saw is well-tuned, very little cleanup is needed. You can either make a dedicated jig every time you need a different taper, or you can use a hinged, universal tapering jig to cut many different tapers. Lots of folks prefer using dedicated jigs because it allows the same results, every time, when reproducing pieces.
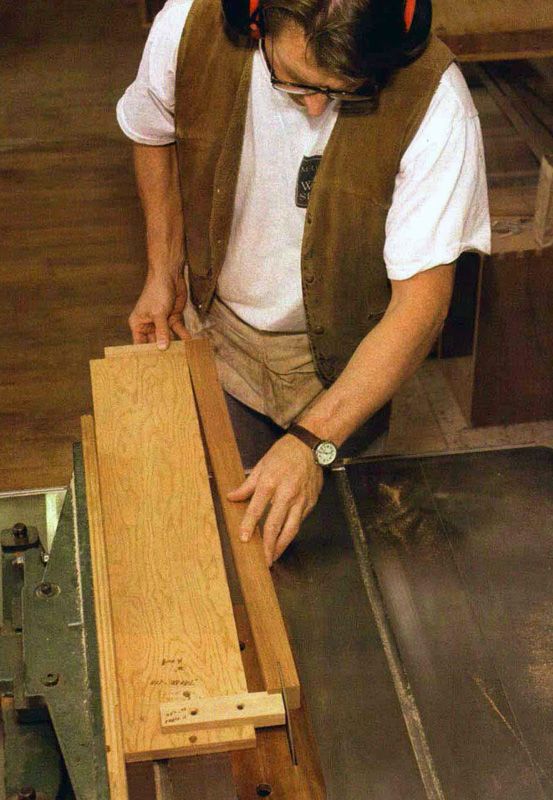
The base of the jig is a straight, flat, piece of plywood just a few inches longer than the leg stock. Cut it so its sides are parallel and its ends are square. Then screw a back stop to one end to catch the wide part of the taper. A front stop, near the other end of the jig, captures the leg and cants it from the plywood at the correct angle for the desired taper.
To set up for the cut, measure from the inside edge of the jig to the widest part of the taper—either the corner of the leg if it’s a full-length taper or a few inches shy of the corner if you want to leave a flat section of the leg for an apron. Use this measurement to set the distance from blade to fence. Keep the jig firmly against the fence, and feed steadily as you make the cut, running the narrow end of the leg into the blades first. For the second taper on a leg, rotate the leg blank 90-degrees clockwise in the jig. By rotating the leg this way, a square, untapered face will rest on the tablesaw.
A Super-Simple Tapering Jig
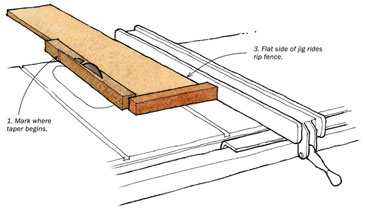
Perhaps the simplest version of a tapering jig can be built from nothing more than a few wood scraps and a single screw. This tapering jig starts with a base made from 3/4-in.-thick plywood, about 8 in. wide by 5 ft. long. Attach a 1-1/2-in.-sq. by 10-in. long stop to one end. Then install a flathead screw in the plywood base, 1/2 in. from the stop.
 |
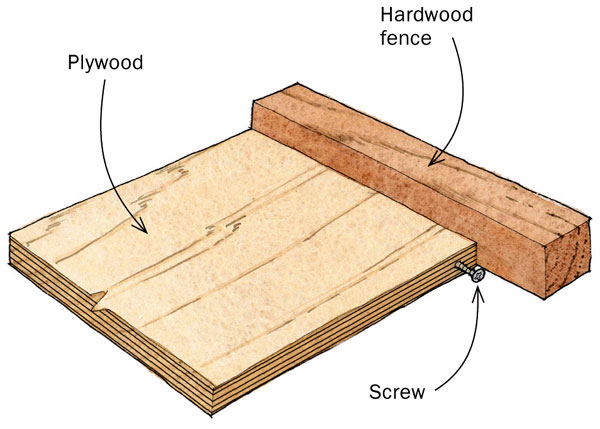 |
To use the jig, mark where you want the taper to start on the workpiece and determine the amount of taper you need. If you want a 1/2-in. taper, for example, unscrew the screw 1/2 in. Place the jig against the rip fence with the bottom of the leg against the stop and the screw. Slide the rip fence over until the blade just touches the mark where you want to start the cut.
| More on tablesaw jigs and tricks: |
Clean Up the Tapers
Some cleanup is almost always required after you’ve cut the basic tapers. Even a planer can leave mill marks. Here are three simple methods for cleaning tapers.
Use a Jointer
This tool does a great job of cleaning up saw marks. You can go straight from the bandsaw to the jointer. Just set the infeed table for a light cut and be sure to use a push stick. To avoid tearout, you should cut with the grain. That usually means the narrow end of the leg is last to go over the cutterhead. Inspect the taper first, though, checking for grain direction as well as for any high spots that may need to be taken down by hand before you joint the whole length of the taper.
Check, too, to see if one end or another needs more wood removed. You may be able to take slightly more off one end than another by varying the amount of hand pressure you apply. Make sure the tapers are well marked so you can tell when you’re finished. Feed slowly to minimize cutterhead marks.
Use a Router
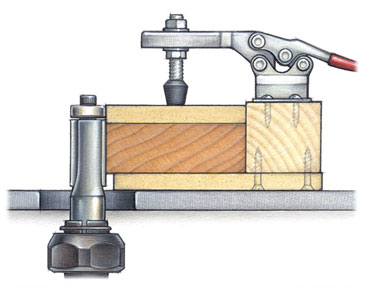 A flush-trimming bit mounted in a router table is another quick way to clean up tapers, especially if you don’t have a jointer. This technique also guarantees that all the tapers are precisely the same. Both top-bearing and bottom-bearing bits will do the job, and you can use the same templates here that you used to lay out tapers from the bandsaw. Double-faced tape works well to attach the template to each leg. For a production run, a jig with attached toggle clamps is better and faster.
Make sure the tapers have been cut close to the template shape; there shouldn’t be more than 1/16 in. of wood to clean up with the router. Set the height of the bit so that the bearing rides firmly against the template. Start the cut back just a little from the end of the leg. Work from the widest part of the taper to the narrowest. Rout the full length, and finish up with one smoothing pass.
Use a Handplane
On wood that’s not particularly gnarly, a well-tuned handplane can be used to clean up tapers straight off the bandsaw, planer or tablesaw. A plane also is a good choice for tapers that have been cleaned up with a jointer or router but still need a little more polishing.
Generally, you’ll want to plane downhill (from the wide part of the taper down to the narrow), but you should check the grain direction of each face face you’re planing to be sure. The grain may surprise you. Make sure your stop or bench dog won’t interfere with the plane at the end of its stroke. Mark a line across your stock at the start of the taper, and take lighter passes as you approach it.




Comments
This article is an excellent overview for making tapers on power tools. I use a very similar method of making my tapers. After layout, I rough cut the taper on the bandsaw. Then, I clean up the taper using an adjustable jig with my drum sander similar to the planer jig shown. I've done it both ways, but I'm a bit more comfortable using my drum sander as 1)the thought of flying stock, jig parts and broken planer knives in the event of a major miscalculation on my part scares the bejeebers out of me, and 2) I can sand the tapers down pretty fine saving a bunch of time. Tim
Tapering Jig is faster and easy. Great article!
Lots of ways to cut tapers...
Actually you guys missed this one and it's how I do it now... it's pretty easy and works great.
http://www.popularwoodworking.com/article/jointer_to_taper_legs/
One quick safety note.....
Never EVER, EVER stand inline with either the infeed or the outfeed end of ANY tool. I've been woodworking since 1972 when I apprenticed in a column and molding mill. I've seen things thrown out of all kinds of machines at really incredible speeds, where they sometimes even go through walls.
A couple of times when I've broken this rule...and we all break the rules sometimes when under pressure...I've ended up with something shoved into my gut knocking the wind out of me.
Remember...knots break out, wood splits and jigs vibrate loose. I always prepare for the worst that can happen.
Tapering a leg whose cross section remains rectangular is not at all difficult with any of a number of easy-to-build jigs. I would like to know how to create a tapered circular leg without a lathe.
A tapered leg whose cross section remains rectangular is easy. I would like to know how to create a circular tapered leg from a square blank, with a lathe, a what is best tool for this, such as spokeshve, draw knife, etc.
Log in or create an account to post a comment.
Sign up Log in