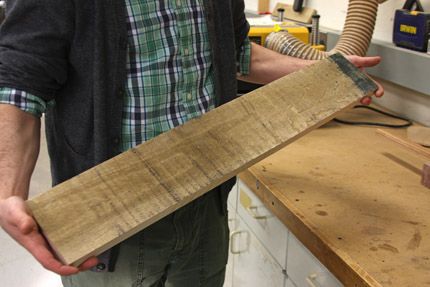
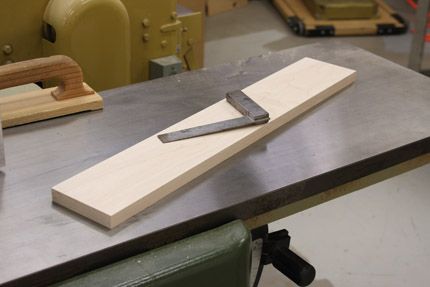
Here's the workpiece I ran my test with--a rough-sawn piece of maple.
This past June, my wife and I purchased our first house-a 1900 stucco home with a basement that has a long history as a workshop. Recently, while beginning the process of designing my new basement shop, I came to the realization that I would never be able to afford a jointer larger than 8-in. Sure, I could purchase a 100-year-old, 12-in. beast like my colleague Matt Kenney, and spend a month rehabbing it but to be frank, I just don’t have the time.
In my five years at Fine Woodworking, I’ve been spoiled by the massive size of our SCMI jointer here in the shop at Newtown, CT. I’ve never had any problem milling any piece of stock for any of my projects. Our 16-in. monster is a dream to use but again, way out of my price range. So what’s a guy to do when his jointer just isn’t big enough for the workpiece he needs to mill? I suppose I could flatten a face by hand but I’d rather use a machine for rough milling and save the handwork for final smoothing.
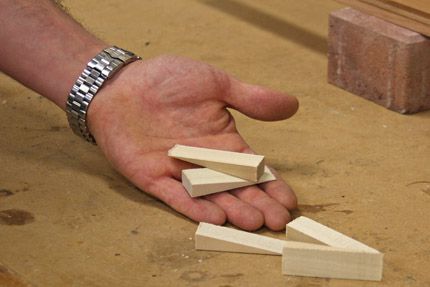
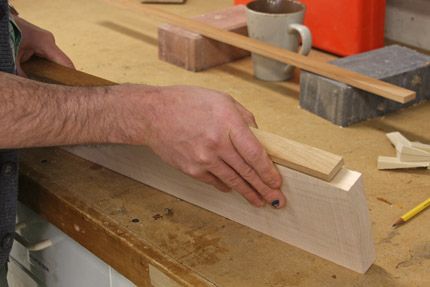
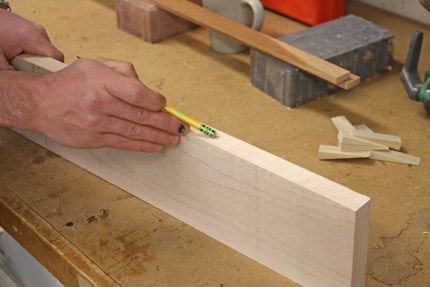
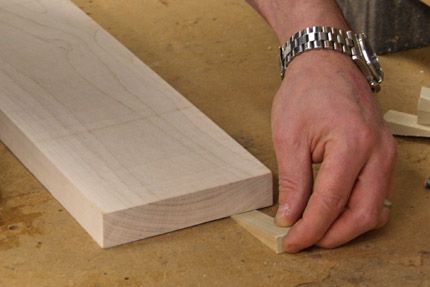
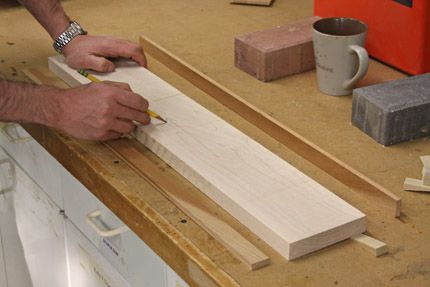
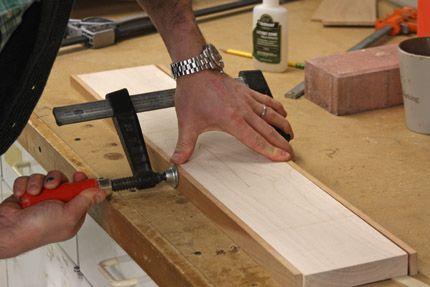
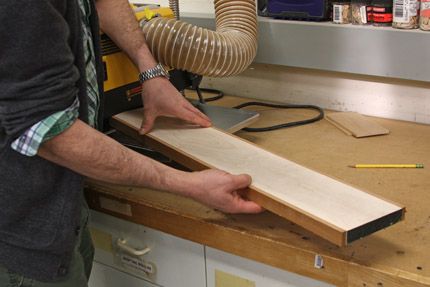
Several years ago, FWW ran a Methods of Work tip by reader Jerry Lyons titled Glue on Rails to Flatten a Wide Board. This technique uses a planer to flatten the first face of a board, as opposed to a jointer. Lyons begins by cutting his workpiece to the shortest length possible and then proceeds to joint each of the two edges straight. Next, he places the board down on a flat work surface, cupped side up and uses wedges inserted at the ends, near each corner, to level the board until it doesn’t rock. Finally, he glues on rails to the board’s edges so their bottoms rest flat atop the work surface, gluing and clamping them into place. After the glue has cured, he removes the clamps, double checks that the rails are still registering against the flat work surface (he takes care of high spots with a bit of handplaning-nothing major) and sends the piece through the planer.
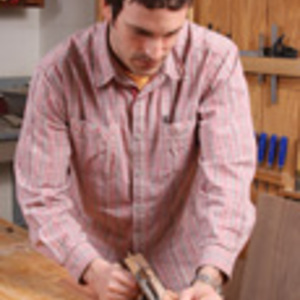
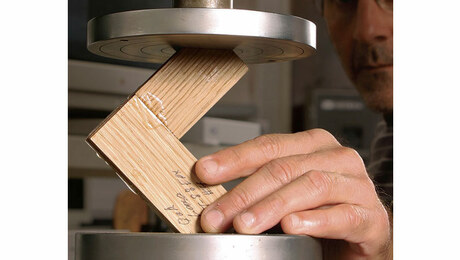
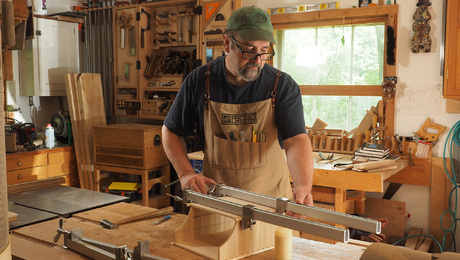
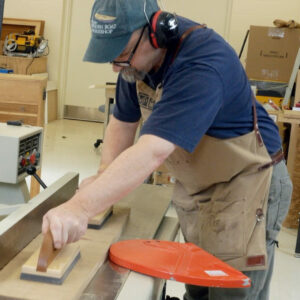
I’ve always been curious to try the technique and decided to run a “proof of concept” test using a 13-in. DeWalt planer and an 8-in. wide maple scrap. The proof is in the pudding. Have a look at the photos above for the play-by-play.





Comments
Maybe it's just me, but this method feels like an awful amount of work compared to jointing with a hand plane, a straight edge and a couple of winding sticks. Cheers!
It's not just you...
Hi jlecomete:
Truth-be-told - it was super-fast and easy.
Cheers!
Ed
I'm surprised you didn't extend the rails to avoid snipe. I have used this technique on short boards and it works great.
nanomeister: VERY good point. Indeed, extending the rails will avert snipe! Cheers, E
It certainly isn't just you, jlecomte.
This looks like an interesting technique but I think it needs to be reserved for larger boards. I know the board you selected was for 'proof of concept' Ed but I tend to agree with jlecomte; you'd have been much better off using a hand plane.
I used this method to flatten the 3 sections for my workbench top (hard maple) that were about 3.5" x 11" x 78" on my 13" Delta planer & it worked great. The rails were about 8" longer on each end to prevent snipe. As mentioned by others, it may not be as efficient to use on small pieces.
A decade or so ago FWW came out with an article and plans to build a sled that carried the whole board thru the planer. It was about 12" wide and 60" long and had 3/8 shock cord to hold the workpiece to the sled and wedges to hold it flat for the initial flattening of one side. When flat the piece is flipped and is run thru the planer without the sled. Works great but heavy. This method looks a lot easier. And yes, do add extra length for snipe. 8' is excessive tho 4" is good enough. You only need to cover the distance from the cutterhead bottom dead center to the outfeed roller bottom dead center. Rarely over 3-4".
A similar technique was described a few years ago in FWW, for taking "wind" out of a board, by attaching it to a flat sled of MDF using hot-melt glue and shims to support the high corners, and then passing the whole thing through a thickness planer. I recently used this technique on a piece of 4/4 bloodwood with a pronounced twist. Although it took some time, it worked great - I ended up with a flat, straight board. Sadly, when I then ripped off pieces of the size I wanted for my project, the "wind" promptly reappeared in each separate piece!
WHOA, Been a woodworker for almost 50 years, 20 of that without a jointer or a thickness planer!!!!!!!!! How in HEdouble L does anyone feed a cupped and twisted 12" board across a set 3 knives spinning at about 3,000 rpm, (giving you approx. 9,000 strikes on that board every minute) I have a 50 year old Delta 6" jointer that I rescued from a junkyard 30 years ago. I use it to joint edges primarily. But have used it to flatten boards that are about 6 " wide, providing I have only 1 or 2 boards to do. Any more that and I glued sacrificial " rails on to provide a flat reference surface, leaving these rails about 3" longer on each end to eliminate snipe. Contrary to the article, I leave the rails on until both sides have been run thru the thickness planer and the board fully surfaced on both sides. If the board exceeds the capacity of my thickness planer, I split it and do the same thing. leaving it about 1/64 thicker than I want, so I can glue it back up and make a pass through the planer- without the rails...... This rail trick allows me to salvage wood that most woodworkers would turn their nose up at when looking at it.
Reading about the fascination with those monster wood working machines called "JOINTERS" tells me that none of you have seen or been involved with a jointer kickback!!!!!!!
I saw one where the cutter head tore a knot out and when the cussing quit and the bleeding stopped, we found that a 2" chunk of the in-feed table was missing and a part of the cutter head and knife was also gone. We picked up that 10" x 8' board 3 feet away..... By the way, this was an OLD Sidney and is now a 300# boat anchor.
I have a friend in Nebraska that provides me with exceptionally large walnut cut offs that are rough sawn, cupped, bowed and just about any other wood defect you can think of, and this the method I use to make clocks and furniture. He or a friend of his delivers it to me when they pass through Arizona.
Seems to me that some people are impressed by tool size, rather than practicality....
BTW, the guy was using 2 of those plastic push blocks, when the dust settled, all he had in his hands were the handles. When asked what he would have done had he had a smaller machine, he "Said cut the knot out by splitting the board".....
When you flatten the two edges how do you get them parallel to each other? There isn't a reference surface. It seem like your rails could be skewed to each other and not sit flat or doesn't that matter?
I agree with jlecomte. I have only a 6-inch Delta table top jointer--no surface planer, and twice a year I have to re-level the feed table. Unfortunately, I usually find out it is out of level AFTER ruining a board. Which is I went to hand planes. Much more enjoyable. A jointer (#7) plane is one of those tools that when properly tuned really does "do the work for you." The largest board I've hand planed so far was only 36x9, but I enjoyed it and didn't have to put up with dust, noise, or SANDING. As Paul Sellers put it, it's the difference between machining wood and working wood. The Delta is safely stowed away under my bench collecting shavings until I get around to putting it on Craigslist.
Hmm, so he glues rails on the workpiece, then the next step is removing those rails. Why bother, when the rails are not involved in the planing process?
Or is the rails on- rails off exercise just a way to kill time while the planer comes up to speed?
Oops! I saw the contradiction- in the penultimate pic the entire "assembly" is run thru the planer.
(that's what I get for reading instructions)
I have used this method for 25 years now works great. For edges I use a 10 foot long straight edge and a router. Owned a jointer for 4 months and got rid of it, found it off a lot of work and time when I can do everything it does in half the time using this method and my router.
i need to try this. Ed, how did you get the wood strips off the sides when you were done? how much damage to wood from removing them?
skip all the drama "just hot glue rough lumber to level boards and put though the planner. You can build the glue up to hold boards in place. I recently built a sled and put 10inch wide by 7ft boards trough my bench top planner they were rough cherry boards 5/4 for bed rails.
skip all the drama "just hot glue rough lumber to level boards and put though the planner. You can build the glue up to hold boards in place. I recently built a sled and put 10inch wide by 7ft boards trough my bench top planner they were rough cherry boards 5/4 for bed rails.
This is a nice technique for occasional use-- simpler than constructing the heavy sled planer sled described in the FWW article by Keith Rust several years back. I've been thinking about trading up from my 6" jointer to a combo 12" planer-jointer, but this looks like an interesting alternative for a hobbyist on a budget.
For those who commented about the joys of working wood with a hand plane, I spent most of the second semester of 7th grade woodworking class trying to flatten the edges of 3 boards with a hand plane so I could edge glue them together to make a cutting board, and never got them exactly right. And if I had, I probably wouldn't have gotten the glued-up cutting board faces flat until half way through senior year. So I'll stick with machinery for milling my wood. :-)
opa2125- keaka: Step 1. lay your board on a flat surface. Step 2. Measure from flat surface to the highest corner of the board and add approx. 1/16" to measurement- this will be the thickness of your sacrificial rails. Step 3. without moving board out of position, glue and clamp rails to board. top and bottom surfaces of rails are now in the same plane and parallel to each other. Step 4. I normally run one side through until I have planed one surface of the rails and board flat, then turn the board over and run it through the planer to surface the uneven side. A word of caution here- step 4 will determine the final thickness of the board, and will generally result in a thinner board than you wanted. Recommended length of board- approximately 48", and the rails should extend about 3" beyond each end of the board.. Rails are removed by ripping on the tablesaw, just nicking the glue line giving you maximum width of your board and parallel edges. Oh Oh, forgot to mention- you need to joint at least one edge on the jointer, or "straight line saw" one edge and then rip the other to provide a flat edge for the glue to adhere to..
For fpratt: this is practical for short pieces particularly in that you make the rails longer is all, this allows to you to plane pieces less than 1 sq." using rails about 12" long........
wow! thanks for the idea on just ripping the fences off with the table saw - so simple, easy and clean, i feel a bit stupid for not thinking of it myself...can't wait to try this out.
Tips of this sort are a HUGE help to those of us who are just starting to equip a serious shop and need to allocate the budget (and floor space) appropriately. Yes, combined jointer/planers are now available, but if I can get by with one purchase at half the price in exchange for spending just a few more minutes and a bit of delayed gratification while the glue sets...
The sled has the advantage of not having to wait, and of having more support points hence the ability to handle longer boards. But it does require an up-front investment, and it will steal a bit more from the maximum thickness you can handle if that matters.
The hot-glue "poor man's sled" alternative someone suggested is an interesting compromise between the two. I'm slightly skeptical about whether flexibility in the system would defeat the purpose...
It'd be interesting to see these tested head-to-head.
what happened to the wood between photo1 and photo 4, the edges and top look like they have just come off, of a spiral head jointer, or is that trick photography, maybe the wood south of the equator just looks like it comes from the tip
For those wondering about the difference in appearance between the two faces of the board shown in the demo: this was a piece of scrap I happened upon which seemed to have been re-sawn at one point, rendering one side brighter looking than the other (exterior) side of the board. That's all.
Best,
Ed
I don't have a joiner and consequently, four-square my boards mostly by hand. Normally, I flatten a face and then square the two sides to the milled face before running the final face through my thickness planer. When you straighten the edges with a joiner plane first, how do you assure the edges are coplanar?
I am with 44444444. I use a sled, but instead of hot gluing my board to the sled, I use shimes and double sided take. If my board is twisted or cupped, I reduce the width or length as necessary to reduce the amount of wood I need to remove. Once I have one flat side, I set the sled aside and finish the job.
msandman,
If I had tried to drive a car in the 7th grade, I probably would have gotten bad results too... that didn't stop me from driving to the office this morning :)
Great tip! Following up on keaka's comment(s), I believe the phrase "after the glue has cured, he removes the rails ..." should have been "after the glue has cured, he removes the clamps ...." I, too, was confused by the rails-on, rails-off approach but looking back at the original reader tip helped me figure it out.
to USAFCHIEF,
If your woodworking is anywhere near as entertaining as your writing, then you are an artist for sure!
Love reading the friendly banter/advice.
:)
Like to see video on this method of flatting and straighting board
I'm new to the wood working and would like to now how to make one side of the board flat and the other side that still has that uneven, rustic look how would you go about that?
Thanks for the technique tip... simple and quick. Extending the strips to avoid the snipe is good too.
Nice tip Ed, but the method is improved by making the rails 2 - 3 inches longer than the work piece so that if your planer is prone to snipe, the snipe is limited to the rails.
I took the time to make a modified version of the sled recently and it was time well spent for me--no waiting for glue to dry.
The bigger question is what happened to Ed's middle finger? I smell a story. . .
How do you "joint each of the two edges straight" on a twisted board? The resulting edges will also have a twist.
Log in or create an account to post a comment.
Sign up Log in