Mid-Century-Style Easy Chair
Scott McGlasson's chair combines mid-century style and hardwood scraps into a cool, comfortable chair.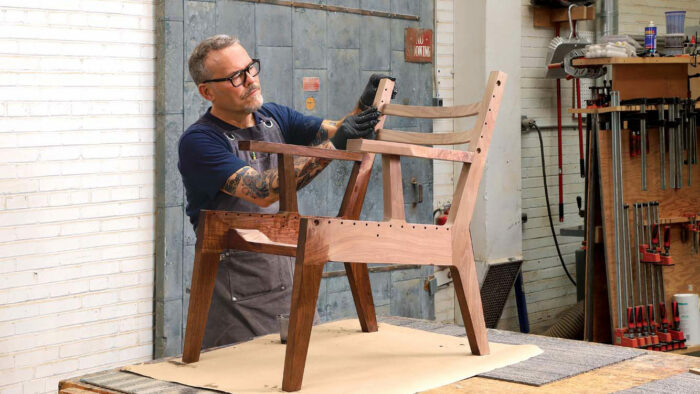
Synopsis: The structure of Scott McGlasson’s rope-and-tile chair is simple: two hefty parallel sides are connected by hefty struts and rails, and the tiles are strung between the sides on high-grade polyester rope. McGlasson cuts all the side parts from a single plank to ensure uniformity in color and figure. The parts are joined by Dominos. He makes the tiles from off-cut pieces of walnut burl left over from other projects. The result is a sturdy but comfortable chair in a mid-century style.
While the design for my rope-and-tile seats originated from a desire to make an enduring, comfortable, handcrafted chair, it was also about finding a use for the offcut pieces of beautiful walnut burl that were piling up from other projects. Another impetus was my affection for the wooden bead-and-rope pads that cab drivers used to cover their vinyl car seats in the 1970s. And when it came to determining the exact configuration of tiles, I thought of the running-bond pattern in which bricks are often laid, where each brick half overlaps the one beside it. I love the look of that pattern, and since using it would involve offsetting adjacent tiles, it promised a more comfortable seat.
My series of rope-and-tile seating pieces started with an easy chair and expanded over the years to include a chaise lounge, an ottoman, a rocking chair, and various benches. I’m attracted to simple modern forms and clean lines, and those pieces reflect that. When I built the easy chair, I referenced dimensions and angles from two iconic mid-century chairs that I own, the Eames Molded Plywood Lounge and the Hans Wegner CH-25. The style of my other rope-and-tile pieces flowed from the easy chair.
The structure for all of them is similar and quite simple: Two beefy, parallel sides are connected by similarly beefy struts and rails, and the tiles are strung between the sides on high-grade polyester rope. The tiles are drilled twice through their edges and lined up with corresponding holes drilled through the chair sides.
Starting the sides
 The sides are the heart and soul of these pieces, key to their structure as well as their style. In the easy chair, each side consists of four pieces, all in the same plane: front leg, side seat rail, arm post, and rear leg/post. The four parts are joined with Dominos. On my first chairs I used mortise-and-tenon joints, but the Dominos make things far simpler. If you don’t have a Domino machine, routing the mortises and making your own floating tenons will work fine. The armrests are added only after the two sides are linked by the struts and back rails.
I like to cut all the side parts from a single plank to ensure that the pieces are uniform in color and figure. For walnut chairs, I love boards with some curly figure. The finished thickness of the sides is 1-5/16 in., so I use 6/4 material. A 6/4 board 10 ft. long and 8 in. wide is ideal, allowing me to get all the parts while working around knots and sapwood.
Before I begin sawing up the plank, I make some templates from 1/2-in. MDF. First, I make a set of five rough templates—one for each of the four parts of the chair side plus the armrest. These rough templates are 1/4 in. or so larger than the final size of the parts, and some of them include squared-off sections outside the final outlines of the parts, which will provide purchase for clamps during assembly. I cut out the rough templates at the bandsaw.
Besides the rough templates, I make one finished template, which represents the entire final shape of the side. Initially I use it as a tracing template; later it guides the router as I flush-trim the assembled side to final size. I cut it out carefully at the bandsaw and sand its edges smooth.
With the templates made, I joint and plane my plank and then lay out all the side parts on it, tracing each rough template two times. Then I bandsaw out all the parts.
| From Fine Woodworking #313
To view the entire article, please click the View PDF button below.
|
 |
All chair templates in SVG or DXF form can be found here.
Chair Template PDF’s can be found here
To print the PDF, download Adobe Acrobat (free) and when you go to print, select the setting “poster” to get a full sized accurately scaled print from your computer. Adobe even prints little crosshairs to line up pages correctly. You can also send these files to any print shop, just make sure they are printing “full scale”, the file is already sized accurately.






Log in or create an account to post a comment.
Sign up Log in