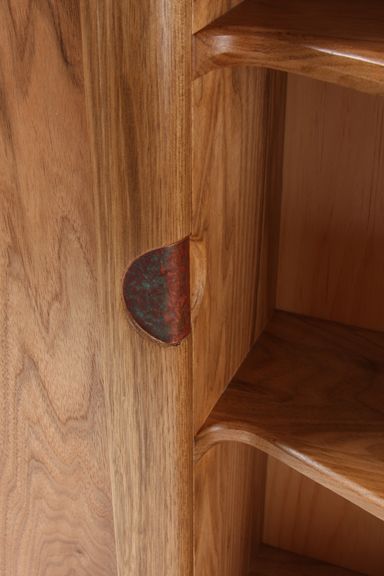
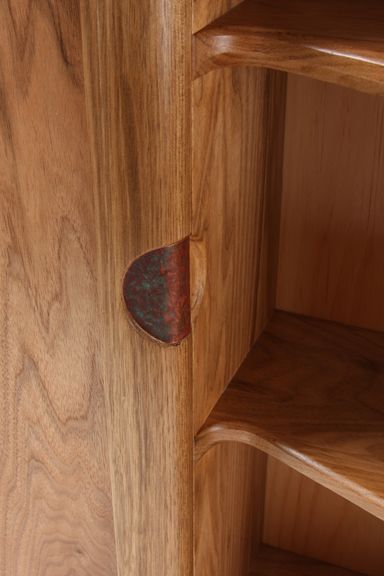
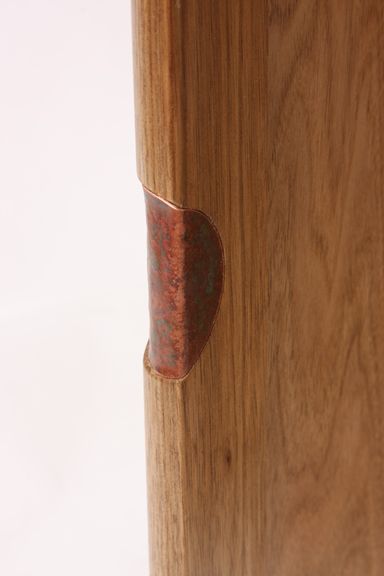
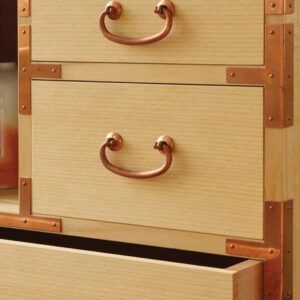
The finished latch.
In keeping with the curved design of a recent cabinet project, I decided to produce a custom door pull made from some recycled copper roof flashing. Weathered copper has a beautiful green patina that’s hard to recreate using store-bought chemicals. It’s also easy to work.
I cut out a 2-in. round scrap and bent it in such a way as to mimic the shape of the door’s edge. By hammering against a large dowel, and some brass and aluminum bar stock I had laying around the shop, I was able to recreate the shape perfectly. As a bonus, all that hammering used to shape the pull left me with a nice peened surface that begs to be touched.
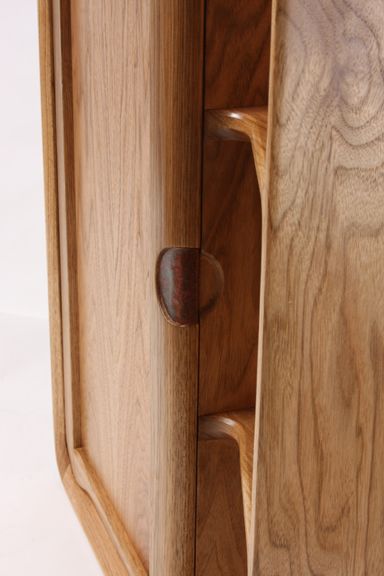
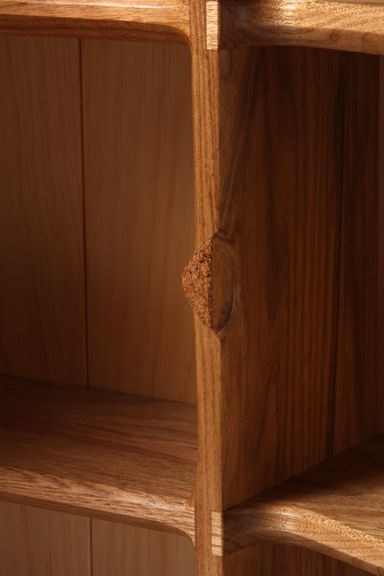
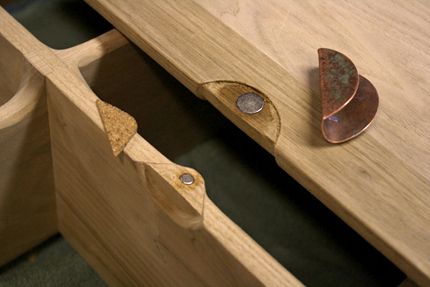
The copper was recessed about 1/8-in. into the door, and I followed up by adding a 1/4-round recess into the cabinet case to expose the door edge for opening. To keep that door shut, I hid a recessed magnet beneath a scrap of cork. Not only does the cork hide the catch, it also provides a nice cushion for the door to close on.






Comments
I've been building a lot of Arts and Crafts style furniture and want the hinge straps that are made of copper. I was wondering what chemicals to use to color the copper. Also, what thickness of copper did you use? Do you have a source for the square copper nails?
Mark - cover of #105
Hi Mark,
I used a piece of old copper roof flashing (about 1/16th in. thick) that already had the patina on it. Some of the patina wore off where it was hammered and bent but most stayed on. I bought copper rose-head boat nails and roves form Lee Valley in the past, and if you want, you can tap them square with a hammer. I think the rose-head will look great with the arts & crafts style.
John
Ordinary, household ammonia works great for patinating copper (or brass). Ammonia's vapors produce one effect with dramatic reds and blues while the liquid form is a bit slower and tends toward darker shades; mostly rich, mahogany-like, browns and reddish blacks.
For small pieces, like the handles in this article, I support the work piece in a zip-sealed plastic bag over a small puddle of ammonia and leave it alone for an hour to a couple of days. Larger pieces go into a re-purposed garment bag suspended from the shop ceiling.
The clear plastic of either of these containers lets me watch the progress and stop it when the patina reaches the desired level. A quick rinse with water and gentle drying with lint-free toweling stops the reaction. When fully dry, I protect the finish with a coat of spray-lacquer of the desired sheen.
Additional interesting effects can be achieved by laying crumpled plastic on the metal while it's being treated. Ammonia-moistened sawdust, in various thicknesses, put on the surface to be treated is another tool. A sponge dipped in ammonia and laid on the surface of interest creates an interesting pattern too. Masking can be effective if a controlled patina is desired. I use masks to incorporate lettering for example. Unfortunately, the adhesive on all the tapes I've tried lose their hold in the presence of ammonia fumes. Instead I mask with clear varnish in a multi-step process conceptually similar to silk-screening.
Ammonia is bad for your lungs, eyes and the environment. Work in a well-ventilated area, wear gloves and eye protection. Use as little ammonia as needed for the job at hand and save what you can for future jobs. When it turns decidedly blue in color dispose of it in accordance with the instructions on the bottle it came in.
Thanks John, you inspired me at the right moment.
Here my little contribution in regard to Copper coloring:
We have a wonderful knowledbase on the web called: Copper Development Assosiation Inc at http://www.copper.org
with everyting you need to know about Copper Patina's
For Brown see: http://www.copper.org/resources/properties/protection/brown.html
For Green see: http://www.copper.org/resources/properties/protection/green.html
For resouces see:
http://www.copper.org/resources/properties/protection/sources.html
Have fun and let me know what you did with it.
Ed
Log in or create an account to post a comment.
Sign up Log in